How KDE Plasma Can Save Your PC from Obsolescence

October 14, 2025, is a big day if you’re a Microsoft Windows user. That’s the day that support for Windows 10 ends. But what if you’re happy with the computer you have now and don’t feel like spending more money to stay with the guys from Redmond? Is there a choice for you? You bet. The KDE Community has precisely what you need. It’s KDE for Windows 10 Exiles. You now have a choice, and all you need to do is upgrade your operating system.

That might seem like a tall order to someone who has never done that sort of thing but it’s not that difficult. The KDE Project has a website dedicated to helping you do precisely that. KDE recommends trying the Plasma desktop. You’ll be glad you did too. That means you get to keep the computer you already have, and it means that from here on out, you’ll be in the driver’s seat, along with the rest of us, using free and open-source software. KDE’s Plasma desktop ensures that “you get all the advantages of the safety, stability, and hi-tech of Linux, with all the features of a beautiful, modern, and powerful graphic environment.”

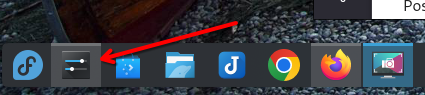
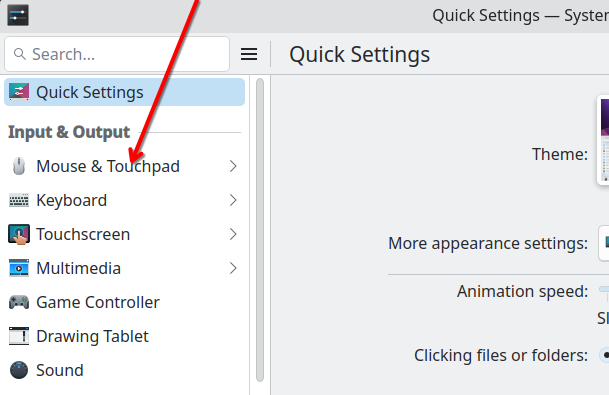
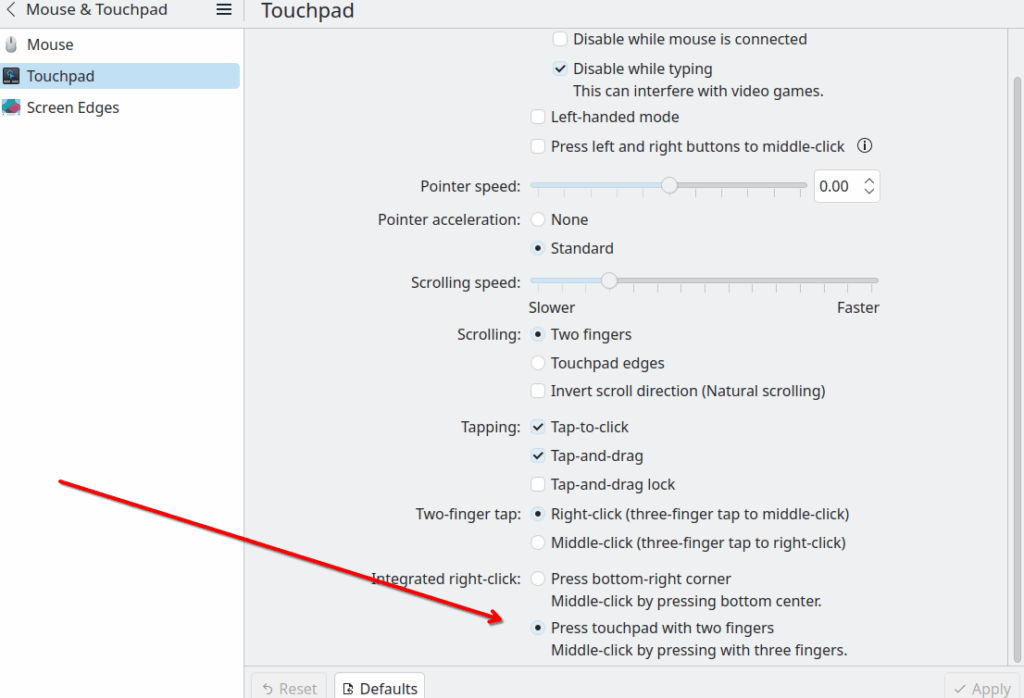
There are several good reasons to choose Plasma, and one of them is that it’s easy. The Plasma desktop doesn’t look that different from the one you have been using. The launch menu is in the bottom left-hand corner, just like it is on Windows 10. Plasma is powerful and lets you move things around so that your workflow could be precisely what you need it to be. The best thing about Plasma is that it’s free. It can be on your computer or everyone in your department could upgrade to Plasma for free. Plasma is powerful. You’ll discover that Plasma lets you have up to four desktops. You’re no longer constrained to just one.

Organizing your files and folders requires some planning, but it’s an easy task. Get a USB-compatible external hard drive and store all the data you want to keep on it. Later, Plasma will have no trouble reading it. Most of the hardware you’ll use, whether it’s WiFi or Bluetooth, will be configured by the operating system. If you’re a Microsoft Office user, your documents can be read by LibreOffice, which is included in most standard Linux distributions.

Moving to Linux means that you’ll be giving up viruses and virus-related scams. You won’t be getting any advertisements from the folks in Redmond. There won’t be telemetry built into your operating system and its software. You will begin to enjoy absolute privacy, and you won’t be forced to upgrade. Your computer will last much longer. There are no hidden costs with Linux.

I am a long-time Linux user, but I’ve recently converted to KDE Plasma on Fedora 42. Many Linux distributions feature the Plasma desktop. There are many other desktop options for Linux, so if you don’t care for Plasma, be sure to check these other desktop environments: Gnome, XFCE, MATE, Cinnamon, and LXQT. Use this do-it-yourself guide from the End of 10 website to guide your upgrade.

Solving the touchpad problem

In the last blog post I wrote about the new Lenovo V 15 laptop I purchased and installed Fedora KDE Plasma 42. One of the annoying problems I have had in the last day since setting this laptop up is the lack of access to a right button click using just the touchpad. I had resigned myself to just using the wireless Logitech mouse but it still dogged me that I couldn’t figure out the problem.

One of the best things about the KDE Plasma desktop is the incredible granularity of the controls that a user has to customize the desktop for each person. I did some searching in Fedora forums and on Reddit, then I went back to the ‘System Settings’, which are myriad. The solution was right before me, but I had not seen it. Navigate to the lower left of the Fedora KDE Desktop display and the first icon on the panel is ‘System Settings’ indicated by the red arrow below.

Screen picture by Don Watkins CC by SA 4.0

Click on the ‘System Settings’ which opens the following menu option. Select the ‘Mouse and Touchpad’ option.

Screen picture by Don Watkins CC by SA 4.0

Then select the ‘Touchpad’ option. The’ Integrated right click’ option is at the bottom right of the menu. Be sure to select the second option, which allows you to click anywhere on the touchpad with two fingers to create the same effect as a right click with the mouse.

Screen picture by Don Watkins CC by SA 4.0

Problem solved! Thank you KDE Plasma desktop and the Fedora team.

Lenovo V15 & Linux: A Perfect Match? My Fedora KDE Plasma Experience

I’ve been looking for a new laptop for a couple of months because the one I’ve been using is missing a ‘P’ key. Replacing the key turned out to be more work than I was interested in pursuing, so I had to decide what I would do to replace the unit. Recently, I was helping a friend transition from her old laptop to a new one she had purchased at a local store, and that store invited me to consider a Lenovo V 15 with a Ryzen 7 CPU, 16 GB RAM, and a 512 GB NVMe drive. The price was right, but I wasn’t sure whether this unit would work with Linux. I have been using Fedora KDE Plasma since January and wanted to continue using it. Still, there was very little information in any place I searched on the internet about whether this version 15 would work with Linux.

I decided to proceed with the purchase, and today, I am glad to report that the unit works quite well with Fedora. I’m pretty sure you might be interested in installing almost any other Linux distribution on it. This is my first ever Lenovo. I purchased from BJs.com . It came from Lenovo with Windows 11 Home, but that OS was never allowed to boot. I installed Fedora 42 KDE Plasma from a USB drive and am now getting used to it.

I installed ‘inxi’ so that you could look at the internals of this new system.

System:
    Kernel: 6.14.5-300.fc42.x86_64 arch: x86_64 bits: 64
  Desktop: KDE Plasma v: 6.3.5 Distro: Fedora Linux 42 (KDE Plasma Desktop
    Edition)
Machine:
  Type: Laptop System: LENOVO product: 82YY v: Lenovo V15 G4 ABP
    serial: <superuser required>
  Mobo: LENOVO model: LNVNB161216 v: SDK0T76463WIN
    serial: <superuser required> UEFI: LENOVO v: MSCN17WW date: 08/08/2024
Battery:
  ID-1: BAT0 charge: 25.5 Wh (65.4%) condition: 39.0/38.0 Wh (102.5%)
    volts: 7.9 min: 7.7
CPU:
  Info: 8-core AMD Ryzen 7 7730U with Radeon Graphics [MT MCP] speed (MHz):
    avg: 1397 min/max: 400/4547
Graphics:
  Device-1: Advanced Micro Devices [AMD/ATI] Barcelo driver: amdgpu v: kernel
  Device-2: Bison Integrated Camera driver: uvcvideo type: USB
  Display: wayland server: Xwayland v: 24.1.6 compositor: kwin_wayland
    driver: gpu: amdgpu resolution: 1920x1080~60Hz
  API: OpenGL v: 4.6 compat-v: 4.5 vendor: amd mesa v: 25.0.4 renderer: AMD
    Radeon Graphics (radeonsi renoir ACO DRM 3.61 6.14.5-300.fc42.x86_64)
  Info: Tools: api: clinfo, eglinfo, glxinfo, vulkaninfo
    de: kscreen-console,kscreen-doctor wl: wayland-info x11: xdriinfo,
    xdpyinfo, xprop, xrandr
Network:
  Device-1: Realtek RTL8111/8168/8211/8411 PCI Express Gigabit Ethernet
    driver: r8169
  Device-2: Realtek RTL8852BE PCIe 802.11ax Wireless Network
    driver: rtw89_8852be
Drives:
  Local Storage: total: 476.94 GiB used: 6.07 GiB (1.3%)
Info:
  Memory: total: 16 GiB note: est. available: 13.48 GiB used: 3.88 GiB (28.8%)
  Processes: 371 Uptime: 1h 21m Shell: Bash inxi: 3.3.38

It is replacing a Dell Latitude 5410. The keyboard seems light but easy to use, and the ‘P’ key works. The unit is relatively light, and the case is plastic. The display is more than adequate. I’m getting used to it. I use an external Logitech M325 wireless mouse, so I don’t typically use the touchpad. The touch pad is adequate but not impressive. Maybe I’ll discover how to fine-tune that. I’m very impressed with the Realtek wireless. I like the fact that it’s got an Ethernet port on it, too. Sometimes I’m called on to troubleshoot connections where that is useful. It has two USB-A ports, one USB-C port, an HDMI port, and a headphone port. The weight is listed at 3.64 pounds but seems lighter. I’m happy with it and wanted to share this with folks like me that were looking for new laptop that they could enjoy using Linux on.

Celebrating 20 Years of Open Document Format: A Milestone for Digital Freedom

LibreOffice is a free and open-source office productivity suite developed by The Document Foundation (TDF). It originated as a fork of OpenOffice.org in 2010. I have been using LibreOffice Writer, Impress, and Calc almost since its inception. It was an easy move from OpenOffice.org. I readily recommend LibreOffice to all those who ask for my technical assistance.

Few innovations in open standards and free software have had the lasting impact of the Open Document Format (ODF). This year marks a significant milestone—the 20th anniversary of its ratification as an OASIS standard. Since its approval in 2005, ODF has established itself as the go-to open standard for office documents and championed digital independence, interoperability, and content transparency.

Developed initially as an XML-based format to ensure universal access to documents across various platforms and software from different vendors, the Open Document Format (ODF) has become a cornerstone of technology policy for governments, educational institutions, and organizations that prefer open, vendor-independent formats to maintain their digital sovereignty.

Eliane Domingos, Chairwoman of The Document Foundation, emphasizes that ODF is more than a technical specification—it represents digital freedom, interoperability, and user empowerment. She highlights its role in protecting individuals and organizations from restrictive Big Tech practices, ensuring they maintain full control over their content. At a time when proprietary systems risk undermining independence, ODF stands as a reliable safeguard for open access and user autonomy.

ODF serves as the default file format for LibreOffice, the most widely recognized and utilized open-source office suite, with seamless compatibility across various applications. Two decades since its creation, its lasting impact reflects the foresight of its developers and the open-source community’s steadfast commitment to transparency, accessibility, and innovation.

From Snap to Share: Why KDE Spectacle is a Must-Have Tool

Writing blog posts that share my experiences with Linux and open-source software often requires screenshots of accomplishing a task or an expected outcome. Over time, I have used a number of such programs in Windows, macOS, and Linux. Most recently, using Fedora 42 KDE Plasma has introduced me to Spectacle. It can capture images of the entire desktop, a single monitor, the currently active window, the window under the mouse, or a specific rectangular area of the screen. Spectacle is open source with a GPL v2 license. It has been developed under the KDE umbrella. The source code is freely available. The project provides adequate documentation and a forum where help is readily available.

Screen picture by Don Watkins CC by SA 4.0

Spectacle offers all the tools I need to work successfully and effortlessly. It features an intuitive interface and outstanding tools that make it easy to capture images and annotate them for all of my writing projects.

Spectacle image captures default to ‘png’ but can be saved in several formats, including JPEG, AVIF, TIFF, Windows BMP, and others. The screen images can be directly exported to other installed applications on your system.

Screen picture by Don Watkins CC by SA 4.0

Spectacle provides an excellent configuration menu panel that easily allows users to configure the program for their optimum use.

Screen picture by Don Watkins CC by SA 4.0

Spectacle provides excellent documentation with a handbook under the ‘Help’ menu in the application.

Screen picture by Don Watkins CC by SA 4.0

In conclusion, KDE Spectacle is a robust and versatile tool for capturing screenshots in Linux environments, embodying the spirit of open-source collaboration. Its seamless functionality and adaptability make it an invaluable asset for anyone who frequently documents their experiences or workflows with Linux and KDE Plasma. Whether you’re a seasoned Linux user or just beginning your journey, Spectacle is undoubtedly worth incorporating into your toolkit.

Fedora KDE Plasma and the Curious Case of Chrome’s Muted Audio

I have been using Fedora with the KDE Plasma desktop environment for almost three months, and overall, it’s been a wonderful experience. However, I’ve encountered some issues along the way. The most recent problem involved the Chrome browser. A couple of weeks ago, Chrome stopped functioning correctly, and I couldn’t launch it even after rebooting my computer. As a solution, I uninstalled Chrome using the command line and then installed the Flatpak version. This version worked well until yesterday, when I experienced problems with audio output while trying to watch videos on YouTube and Acorn TV.

Firefox and Chromium worked on those sites, but Chrome did not. After searching online for a solution, I found several suggestions for adjusting settings within the browser. However, I could not find a fix until I discovered that KDE Plasma has a sound control feature that allows you to turn the sound on or off specifically for the Chrome browser.

First, I had to open ‘System Settings,’ which is found on the menu bar, in my case, at the bottom of the display, underneath the red arrow. System settings can also be opened from under the Fedora button to the left of the display.

Screen picture by Don Watkins CC by SA 4.0

Now that you have opened the ‘System Settings’ you need to navigate to that section of the settings that addresses the control of ‘Sounds.’

Screen picture by Don Watkins CC by SA 4.0

Upon opening the ‘Sound’ submenu,, I saw that the Chrome browser sound was muted. Unmuting was easy: I clicked on the muted control and sound was restored,, and I was able to enjoy the videos I wanted to view.

Screen picture by Don Watkins CC by SA 4.0

I’m still unsure how the sound got muted in the first place, but I’m glad I found a way to resolve the issue. The KDE Plasma desktop offers more configuration control options than any other Linux system I have used. With this complexity comes great power, but also a steep learning curve. Nonetheless, I continue to be impressed by the capabilities of both Linux and Fedora KDE Plasma.

Exploring UTM and Linux on Apple Silicon

I bought an M3 MacBook Air last fall to experiment with AI tools and LLMs that were available for use on Apple Silicon. The M3 had more RAM than the M2 it replaced and a larger NVME drive. Those were important considerations. I wanted to install Fedora Asahi Linux on it eventually. To my dismay, I learned that the M3 was not supported. The Asahi Project is still working on support for M3 and M4 macOS machines. That news bummed me out when I read it. Recently, I discovered another way to run Linux on an M3 MacBook Air using UTM.

UTM is a virtualization software that can be installed on an M3, and there are a number of Linux virtual machines that can be downloaded and run at near-normal speeds on the M3. According to the project website, “UTM employs Apple’s Hypervisor virtualization framework to run ARM64 operating systems on Apple Silicon at near-native speeds.” This was great news, and I was eager to install it. I decided to use Homebrew to install the software.

% brew install --cask utm

Once the software was installed, I was ready to try it out. A dialog box appears, and you are invited to “Create a New Virtual Machine” or “Browse UTM Gallery,” a tab for the User Guide and one for support. I decided to browse the gallery and was pleasantly surprised to find several prebuilt Linux ARM64 machines ready to run.

Screen picture by Don Watkins CC by SA 4.0

At its core, UTM operates on QEMU—a robust and versatile emulation software that has stood the test of time as a free and open-source solution. Despite its capabilities, QEMU’s extensive array of command-line options and settings can make it challenging to navigate and configure. UTM simplifies this process by offering the same robust functionality as QEMU while eliminating complexity, making it accessible to users without requiring expert-level setup.

I chose Debian 11 XFCE from one of the prebuilt machines, downloaded it quickly, and booted it up. The Debian machine has 1 gigabyte of RAM, a 20 GB disk drive, a VGA console, and an ARM64 architecture.

Screen picture by Don Watkins CC by SA 4.0

The project’s documentation is excellent and extensive. It is open source with an Apache 2.0 license, and the code is available on Github. I’m still exploring and learning each time I use it. It’s fun to be able to use Linux on Apple Silicon at near-native speeds.

How Linux Mint Made a Dell Latitude Shine Again

A few weeks ago, someone at the faith community I attend asked for my help logging into their computer. I suspected it might have been hacked, so I created a Windows 11 boot disk to rescue the computer. The device was a four-year-old Dell Latitude 5320, which was running Windows 11 but not very efficiently. It took over fifteen minutes to start, and once it was running, it was extremely sluggish. I asked the owner if she would mind me rebuilding her computer. It had originally been purchased as a Windows 10 machine with an i5 processor and 8 gigabytes of RAM. While Microsoft has a support page suggesting that such specifications are adequate for Windows 11, from my experience, I believe that 16 gigabytes of RAM are necessary for optimal performance. Additionally, my client used the computer for video conferencing, which is both processor- and RAM-intensive.

I took the unit home and discovered that, in addition to its other woes, the NVME drive was encrypted and needed to be wiped for a fresh install of Linux to occur. I used ‘lsblk‘, which lists block devices and solid state drives on a Linux system, and then using the ‘dd‘ command I booted the laptop with a Linux Mint Live USB drive, opened a terminal,l wiped the drive with the following command:

$ sudo dd if=/dev/uvrandom of=/dev/nvme0nX

It took a couple of hours for that process to complete, and then I completed a fresh install of Linux Mint Cinnamon 22.1. I have had success moving former Windows users to Linux Mint Cinnamon. In addition to the fresh install, I added the Chrome browser for her by downloading the .deb package. I also installed Zoom, her preferred videoconferencing platform, and set up a time to introduce her to her refurbished Linux Mint laptop. I configured LibreOffice so that she could easily exchange documents with other users in her work group without the concern of conflicting file formats.

I set up a time to meet my friend at a nearby university where she volunteers. I demonstrated how easy it is to start a computer equipped with an efficient operating system that runs on Linux. I explained how similar the Cinnamon desktop is to Microsoft Windows. I showed her how to connect to wireless networks and update her computer easily. I demonstrated how to use LibreOffice Writer, how it was similar to Microsoft Word, and how the skills she had acquired using the former would quickly transfer to this new experience.

I demonstrated how she could use the software store to add other free software programs to help her work. She wanted to know how to shut down the computer properly, so we completed several starts and shutdowns. I explained to her how the EXT4 filesystem was superior and more forgiving than her previous experiences with NTFS. She had backups of her documents from Windows and has had no problem transferring them to the refurbished Linux laptop. She was very grateful for my experience and hugged me when she left. I have seen her twice since that day, and she continues to enjoy this new Linux Mint experience.

From Linux to macOS: Embracing Open Source Everywhere

Open-source software is not restricted to Linux. While I spend most of my time reading, writing, and developing on Linux, I can also use many tools I love on macOS and Windows platforms. Last fall, after returning from All Things Open, I purchased an M3 MacBook Air because I wanted to experiment with some of the artificial intelligence applications I had seen at the conference in Raleigh.

As most of you know, Mac computers have a great supply of Apple-developed software, which works well for many folks. However, being a person who is used to the freedom afforded by open source, it didn’t take long before I had installed HomeBrew and then began installing my favorite open source applications.

The first app I installed was Ollama, which I used almost daily to experiment with locally run large language models. Ollama is available under the MIT license. Additionally, I experimented with Hollama, a minimal web user interface for Ollama, which also carries an MIT license. Apple Silicon processors, including the M1, M2, M3, and M4, provide excellent platforms for running locally hosted large language models.

Output from these LLMs is in Markdown, and several open-source Markdown editors are available for MacOS. I prefer MarkText on Linux, but I had trouble installing it on MacOS, so I opted for MacDown, a fine open-source Markdown editor easily installed.

% brew install --cask macdown

Apple supplies its own word processor, spreadsheet, and presentation software, but I chose LibreOffice, my favorite. It is also easily installed with HomeBrew. I also installed Joplin, my favorite cross-platform notetaking app. The world of open-source supplies all my needs.

I recently wrote about Krita and decided to install it on the M3 MacBook, too. It was easy to install with Homebrew. My experience with Krita led me to install Darktable, another open-source graphic program available on macOS. Both are easily installed with Homebrew.

% brew install --cask darktable 
% brew install --cask krita

Gimp and Inkscape are my favorite open-source graphics programs. I regularly use both of them to modify images and create vector graphics. I use VSCodium when writing and learning more about Python code on the Mac.

I installed VideoLan (VLC) on the Mac. VLC is a free, open-source, cross-platform multimedia player and framework that plays most multimedia files.

I also installed DiffusionBee, which has allowed me to explore AI image creation on my desktop.

Completing my list of favorite open-source applications that can be installed and run locally is Bitwarden, my top choice for a password manager. I have been using Bitwarden for nearly six years and highly recommend it.

All of these applications can be easily installed by downloading and installing the .dmg files or by using Homebrew from the command line. I prefer the latter as upgrading all the applications simultaneously is much easier. The number of open-source applications that run on macOS is quite lengthy. I have only shared the ones that I use, but there are many more. I discovered a comprehensive list of them on Github.

Signal: The Privacy-First Messenger Changing the Game

Messaging apps have revolutionized communication, reshaping our daily lives and relationships. It’s hard to imagine a time without SMS paving the way for near-instant connectivity. Could we even fathom returning to a world where real-time communication wasn’t at our fingertips?

Today, we have a plethora of messaging options. Platforms like Signal, Telegram, WhatsApp, iMessage, and Facebook Messenger offer diverse features to suit our preferences. Many apps boast encryption, making users assume their conversations are private and secure.

But how safe are they? Cloud-hosted applications often collect metadata from our interactions. This data—information about who, when, where, and how we communicate—is a goldmine for advertising algorithms. It helps these companies refine their ad targeting, shaping the products and services in our feeds. While these apps may make life more convenient, it’s worth asking: Are they truly looking out for your privacy—or their profit margins?

Signal is advanced end-to-end encryption built on the open-source Signal Protocol. It ensures our conversations remain entirely secure. No one can access your messages or calls. Privacy isn’t an add-on feature—it’s the foundation of Signal’s operation.

I started using Signal a half-dozen years ago when a friend suggested it. I had been looking for a secure messaging system while working on a private estate matter. Signal worked well as I messaged my partner with confidential financial information. It allowed us to send and receive confidential data that was fully encrypted across international boundaries and worldwide.

Signal’s core features are encrypted messaging, voice/video calls, disappearing messages, and group chats. It distinguishes itself from other messaging apps with its commitment to user privacy. There are no ads, no trackers, and minimal data collection. In a world where digital privacy has become paramount for journalists, activists, and anyone who values confidentiality, Signal shines.

Signal’s encryption is powered by the Signal Protocol, a robust cryptographic framework designed to ensure end-to-end security for messages and calls. Signal mobile clients, desktop clients, and server software are free and distributed with an AGPL v. 3 license. Signal is available on Android, iOS, macOS, Windows, and Linux.

You can easily download and install Signal on your desktop or mobile client. Signal currently has approximately seventy million active users, and the app has been downloaded over two hundred twenty million times. Signal is owned and operated by the Signal Foundation, a non-profit organization co-founded in 2018 by Moxie Marlinspike and Brian Acton.

Signal provides excellent documentation to help users get started using the application. The Signal Foundation is a 501c3 nonprofit organization. You can support Signal and the important work it does. Developers are welcome.