When I attended All Things Open a year ago, I carried a Hewlett-Packard DevOne, which I had purchased the year before. Two years ago, I was anxious to try the DevOne because I wanted to try an AMD Ryzen 7 with Linux. It was a platform I had never used. I have been a solid Intel user for Windows, MacOS, and Linux. I liked the size and feel of the computer, but in an all-day conference where I attended all the keynotes and other sessions using the computer for note-taking, tweeting, and tooting, I was disappointed in the battery life.
I came home, put the laptop for sale on E-bay, and decided I was going to buy one of the newer 15-inch M2 MacBook Air computers. I have enjoyed using the MacBook to experiment with Stable Diffusion, DiffusionBee, Llamafile, Ollama, and other applications. I took the MacBook to a half-day conference in mid-April and have used it sparingly since then, but I was determined to give an actual test at All Things Open earlier this week. It surpassed all my expectations for its exceptional battery life. I attended all the keynotes and many sessions where I took notes and live-tooted what I was seeing and hearing, and at the end of the day, each day, I had around seventy percent of battery life. That is simply amazing.
I’m not ready to ditch Linux. I’m writing this article on my main desktop, which runs Linux Mint Cinnamon, but I am impressed with the battery life of the M2 MacBook Air. I have found the M2 chip equal to almost everything I have used it for. Apple has introduced the new MacBook Pro with an M4, sixteen gigabytes of RAM, and 512 GB drive with three Thunderbolt ports and HDMI. I came close to buying one today. I learned while I was at All Things Open that it might make sense for me to get a MacBook with a bit more RAM to continue experimenting with locally hosted large language models.
Being a technophile has its rewards and challenges, and I am presented with another one now. Apple will give me a five hundred eighty dollar trade-in on the M2 MacBook Air. The new MacBook Pro has a fourteen-inch display, and the MacBook Air has a fifteen-inch display. I like the larger display, but there is no doubt that there are compelling reasons to go with the newer, more powerful MacBook Pro with lots of expansion. Should I pay another two hundred dollars for a terabyte of storage, or should I stay with the stock of five hundred twelve gigabyte drives? Lots of decisions.
Ensuring Data Security Through Disk Erasure
Many people choose to encrypt their disk drives because it is one way of ensuring that your data stays secure and safe from the prying eyes of others. I always shy away from encrypting my disk because I don’t have theneed for that kind of security. When one of my computers reaches end or life or I decide to sell it then I take special measures to ensure that all the information is erased. II am also frequently called on to help clients to help them dispose of an old computer when they purchase a new one. What do you do when selling a computer or replacing an old spinning rust drive with a newer solid state drive? That’s when I think of securely erasing them to ensure that confidential information is removed before repurposing or disposing of them.
Fundamentally, disk erasure on Linux serves as a versatile solution that tackles security, compliance, performance, and sustainability needs, catering to the varied demands of users. Whether for individual usage or organizational requirements, disk erasure is a forward-thinking strategy in data management and information security.Here are five commands to erase a disk on Linux:
Here are five command sequences to ensure that data is securely erased from your Linux data drive(s).
dd command:
$ sudo dd if=/dev/zero of=/dev/sdX bs=1MThis command writes zeros to the entire disk, effectively erasing all data.
shred command:
$ sudo shred -v /dev/sdXThe shred command overwrites the disk multiple times, making data recovery very difficult.
wipe Command:
$ sudo wipe -r /dev/sdXThe wipe command is designed to securely erase disks by overwriting them with random data.
blkdiscard Command (for SSDs):
$ sudo blkdiscard /dev/sdXThis command discards all data on the specified SSD, effectively erasing it.
parted and mkfs Commands:
$ sudo parted /dev/sdX mklabel gpt
$ sudo mkfs.ext4 /dev/sdX
Using parted to create a new partition table followed by mkfs to format the disk erases the existing data.
Replace /dev/sdX with your actual disk identifier. Always double-check the device identifier before running any of these commands to avoid accidental data loss.
DIY Bootable Linux Disk Creation Without Internet Access or Additional Tools
I keep a bootable Linux disk with me most of the time because I never know when I am going to need to use one to rescue a crashed Microsoft Windows machine or turn someone on to the Linux desktop. Most distributions include my own daily driver Linux Mint Cinnamon have utilities that make boot disk creation much easier than it used to be. If you are on a Windows or MacOS platform you could use a great utility like Etcher.io which is one of my favorite boot disk creation tools. But let’s suppose that you are using a Linux computer with no connection to the internet and no other disk creation tools.
You could use dd which is tool that many folks have never used but it’s still a reliable utility and one that can make a bootable disk when all else fails. The dd command is a Linux utility that is sometimes referred to as ‘disk destroyer’ or ‘data duplicator and it is very useful and effective if you have no other way to create a bootable USB drive.
You will need a FAT32 formatted USB drive. Then you will need to determine the directory in which the iso file bearing the Linux distribution resides so that you can point to it in your command sequence. You will also need to use the lsblk command to determine which block device you are going to send your data to. Use of the dd command without good information can be devastating to the health of your system as it is easy to overwrite the wrong drive like your boot and/or data drive.
With your USB stick inserted into your computer open a terminal issue the following command:
$ lsblk You should receive an output that looks something like this.
$ /dev/sdb1 or /dev/sdc1
Unmount the drive with the following command.
$ sudo umount /dev/sdX1 Use the dd command to write the ISO file to the USB drive:
$ sudo dd if=/path/to/linux.iso of=/dev/sdX bs=4M status=progress
Replace /path/to/linux.iso with the path to your ISO file and /dev/sdX with the correct device identifier
After the dd command completes, you can verify that the data was written correctly by chechecking the output of lsblk or fdisk -1.
Once the process is complete, safely eject the USB drive:
$ sudo eject /dev/sdX
Now you are ready to start using your newly created Linux boot drive to rescue Windows systems or turn somene on to using Linux.
From web to client: The Mastodon experience
Mastodon is an open-source social networking platform for microblogging. While it has a web-based interface, many users prefer to use a client to access Mastodon. Clients are programs or applications that allow users to access and interact with the Mastodon platform from various devices, including computers, tablets, and phones. I moved to Fosstodon in 2019, and it has become my primary social networking site.
Web Interface
Like most users, I started using the Mastodon web app by pointing my browser at joinmastodon.org. I found an instance to join, created an account, and logged in. I used the web app to read, like, and reblog posts from my favorite Mastodon users. I also replied to posts without ever having to install anything locally. It was a familiar experience based on other social media websites.
The disadvantage of the web app is that it lacks the richness of a dedicated Mastodon client. Clients provide a more organized and streamlined interface, which makes it easier to navigate, manage notifications, and interact with others in the fediverse. Clients also make it easier to find and generate useful hashtags, which are essential to sharing your message in a non-algorithm-driven environment.
Mastodon is open source, though, so you have options. In addition to the web apps, there are a number of Mastodon clients. According to Mastodon, there are nearly sixty clients for Mastodon available for desktop, tablet or phone.
Clients
Each client app has its own unique features, UI design, and functionality. But they all ultimately provide access to the Mastodon platform:
I started my client journey with the Mastodon app for iOS. The app is easy to use and is open source. The app is written in Swift. It is the official iOS app for Mastodon.
I moved to MetaText which is no longer being developed. I liked the Metatext interface. It made interacting with Mastodon easier on my iPhone. Metatext is open source with a GPL v3 license.
I am currently using Ice Cubes which is my favorite Mastodon app for both iOS and MacOS. Ice Cubes has everything I was looking for in a Mastodon client. Crafted using SwiftUI technology exclusively, this application boasts impressive speed, minimal resource consumption, as well as user-friendly functionality. It features an intuitive design framework on iOS devices like iPhone/iPad and MacOS systems.
My favorite desktop Linux app for Mastodon is Tuba. It is available as a Flatpak. It’s intuitive and easy to use. Tuba is open source with a GPL v3 license.
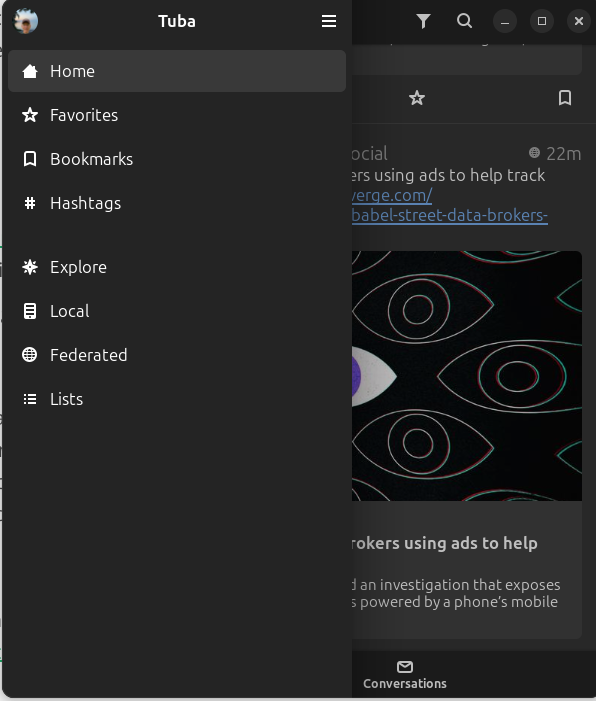
How is Mastodon changing your reading habits? What are your favorite apps? Be sure to comment.
Open WebUI: A nuanced approach to locally hosted Ollama
Open WebUI offers a robust, feature-packed, and intuitive self-hosted interface that operates seamlessly offline. It supports various large language models like Ollama and OpenAI-compatible APIs, Open WebUI is open source with an MIT license. It is easy to download and install and it has excellent documentation. I chose to install it on both my Linux computer and on the M2 MacBook Air. The software is written in Svelte, Python, and TypeScript and has a community of over two-hundred thirty developers working on it.
The documentation states that one of its key features is effortless setup. It was a easy to install. I chose to use the Docker. It boasts a number of other great features including OpenAI API integration, full Markdown and Latex support, a model builder to easily create Ollama models within the application. Be sure to check the documentation for all nuances of this amazing software.
I decided to install Open WebUI with bundled Ollam support for CPU only since my Linux computer does not have a GPU. This container Image unites the power of both Open-WebUI and Ollama for an effortless setup. I used the following Docker install script copied from the Github repository.
$ docker run -d -p 3000:8080 -v ollama:/root/.ollama -v open-webui:/app/backend/data --name open-webui --restart always ghcr.io/open-webui/open-webui:ollama
On the MacBook I chose a slightly different install opting to use the existing Ollama install as I wanted to conserve space on the smaller host drive. I used the following command taken from the Github repository.
% docker run -d -p 3000:8080 --add-host=host.docker.internal:host-gateway -v open-webui:/app/backend/data --name open-webui --restart always ghcr.io/open-webui/open-webui:main
Once the install was complete I pointed my browser to:
http://localhost:3000/auth
I was presented with a login page and asked to supply my email and a password.

First time login will use the ‘Sign up’ link and provide your name, email and a password. Subsequent logins require email and password. After logging in the first time you are presented with “What’s New” about the project and software.

After pressing “Okay, Let’s Go!” I am presented with this display.

Now I am ready to start using Open WebUI.
The first thing you want to do is ‘Select a Model’ at the top left of the display. You can search for models that are available from the Ollama project.

On initial install you will need to download a model from Ollama.com. I enter the model name I want in the search window and press ‘Enter.’ The software downloads the model to my computer.

Now that the model is downloaded and verified I am ready to begin using Open WebUI with my locally hosted Phi3.5 model. Other models can be downloaded and easily installed as well. Be sure to consult the excellent getting started guide and have fun using this feature rich interface. The project has some tutorials to assist new users. In conclusion, launching into an immersive experience through their intuitively designed interface allows users of Open-WebUI to fully leverage its comprehensive array of features.
Urgent Call for Assistance in the Wake of Hurricane Helene’s Devastation on North Carolina
In recent weeks, climate change has wrought untold hardship upon the mountain communities of Western North Carolina. The infamous and powerful Hurricane Helene mercilessly swept through these areas with little warning or respite for those in its path, leaving a trail of destruction that has brought to light both resilience and suffering among local residents.
Volunteers from the organization BonaResponds have been at the forefront since their arrival on-site last weekend—traveling through towns such as Burnsville and Green Mountain bringing hope in a time of despair by providing immediate relief to those affected. Their actions were recognized this morning when Jim Mahar was interviewed Olean area radio station WPIG.
The BonaResponds team has already accomplished significant tasks, including aiding in delivering essential supplies such as food and clothing which had been collected by the Franciscan Sisters of Allegany which is highlighted in a news article in the Olean Times Herald.
In addition to these laudable efforts, there remains a critical need for further assistance as winter’s biting chill descends upon mountain towns already burdened by loss. With many homes left without power—a situation predicted to persist through the season—the urgency of support has never been more pronounced nor direly necessary.
In light of this, we extend a heartfelt plea for any form of aid that can bring solace and some semblance back into these communities’ disrupted lives: connectors compatible with propane tanks to keep warmth alive amidst the freezing temperatures have become an essential commodity. There is a pressing need for generators to supply homes in the area with electrical power. Electric generators with a recommended size is 3600 watts of sustained power.
Here’s how you can provide assistance effectively and immediately to BonaResponds:
- Financial Support – Direct donations are accepted via mail at their onsite address: BonaResponds, St. Bonaventure NY 14778 Alternatively for convenience or anonymity reasons, please consider supporting through PayPal by visiting PositiveRipples website as suggested in the interview with Jim Mahar..
The communities in Western North Carolina have shown tremendous courage in confronting this calamity head-on; they are resilient and hardworking individuals who deserve our assistance. We welcome your help and prayers while assisting them in their need.
Fastfetch: High-Performance Alternative to Neofetch for System Information Display
Yesterday I wrote about Neofetch which is a tool that I have used in the past on Linux systems I owned. It was an easy way to provide a good snapshot of the distribution I was running and some other pertinent information about my computing environment. One of my readers replied to let me know that the project was no longer being maintained. It was last updated in August 2020. The commenter suggested that I check out Fastfetch. I thanked the reader and followed the link he provided to the Github repository for Fastfetch.
The project maintains that it is, “An actively maintained, feature-rich and performance oriented, neofetch like system information tool.” It is easy to install and provides much of the same information that was provided by Neofetch. However, it does supply your IP address but the project maintains that presents no privacy risk. The installation for Fedora and RPM based distributions is familiar by entering the following command.
$ sudo dnf install fastfetchIf you are a Ubuntu based distribution like my Linux Mint daily driver then the installation requires the download of the appropriate .deb file. Once the package was installed on my system I decided to try it.

Fastfetch can be easily installed on a MacOS with Homebrew. I decided to try it on my MacBook.

% brew install fastfetchFastfetch is written in C with 132 contributors. It is open source with an MIT license. In addition to Linux and MacOS systems you can install Fastfetch on Windows with Chocolatey. The project states that Fastfetch is faster than Neofetch and it is actively maintained. Fastfetch has a greater number of features than it’s predecessor and if you want to see them all enter the following command. For more information and examples be sure to visit the project wiki
Exploring Hollama: A Minimalist Web Interface for Ollama
I’ve been continuing the large language model learning experience with my introduction to Hollama. Until now my experience with locally hosted Ollama had been querying models with snippets of Python code, using it in REPL mode and customizing it with text model files. Last week that changed when I listened to a talk about using Hollama.
Hollama is a minimal web user interface for talking to Ollama servers. Like Ollama itself Hollama is open source with an MIT license. Developed initially by Fernando Maclen who is a Miami based designer and software developer. Hollama has nine contributors currently working on the project. It is written in TypeScript and Svelte. The project has documentation on how you can contribute too.
Hollama features large prompt fields, Markdown rendering with syntax highlighting, code editor features, customizable system prompts, multi-language interface along with light and dark themes. You can check out the live demo or download releases for your operating system. You can also self-host with Docker. I decided to download it on the M2 MacBook Air and my Linux computer.
On Linux you download the tar.gz file to your computer and extract it. This opened a directory bearing the name of the compressed file, “Hollama 0.17.4-linux-x64”. I chose to rename the directory Hollama for ease of use. I changed my directory to Hollama and then executed the program.
$ ./holllama The program quickly launches and I was presented with the user interface which is intuitive to an extent.
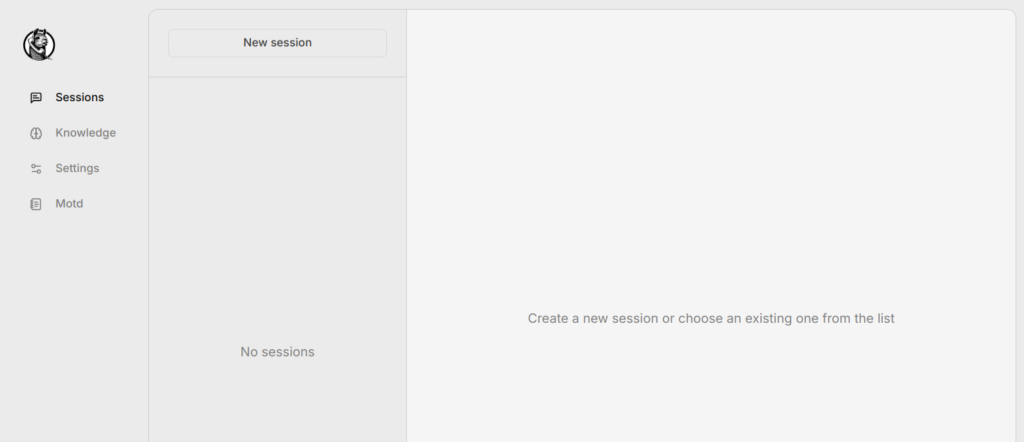
At the bottom of the main menu and not visible in this picture is the toggle for light and dark mode. On the left of the main menu there are four choices. First is ‘Session’ where you will enter your query for the model. The second selection is “Knowledge” where you can develop your model file. Third selection is ‘Settings’ where you will select the model(s) you will use. There is a checkoff for automatic updates. There is a link to browse all the current Ollama models. The final menu selection is ‘Motd’ or message of the day where updates of the project and other news are posted.
Model creation and customization is made much easier using Hollama. In Hollama I complete this model creation in the ‘Knowledge’ tab of the menu. Here I have created a simple ‘Coding’ model as a Python expert.

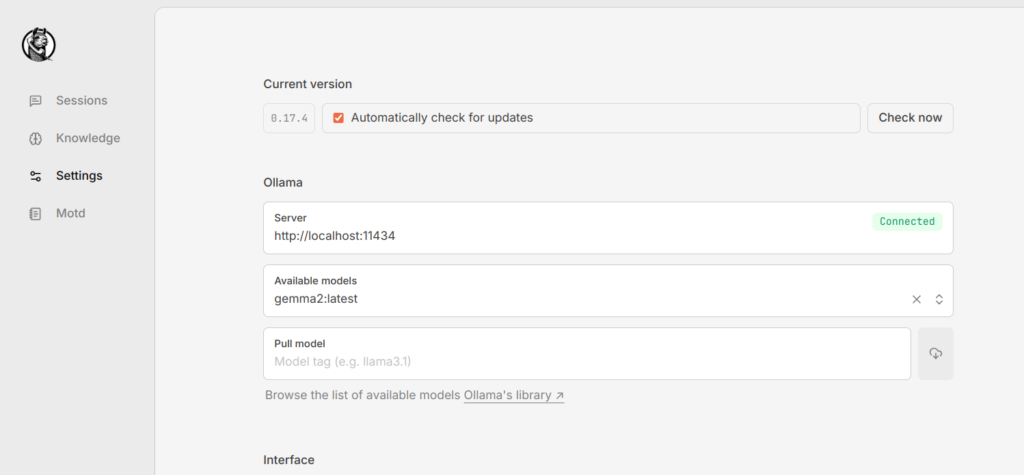
In ‘Settings’ I specify which model I am going to use. I can download additional models and/or select from the models I already have installed on my computer. Here I have set the model to ‘gemma2:latest’. I have the settings so that my software can check for updates. I also can choose which language the model will use. I have a choice of English, Spanish, Turkish, and Japanese
Now that I have selected the ‘Knowledge’ I am going to use and the model I will use I am ready to use the ‘Session’ section of the menu and create a new session. I selected ‘New Session’ at the top and all my othe parameters are set correctly.
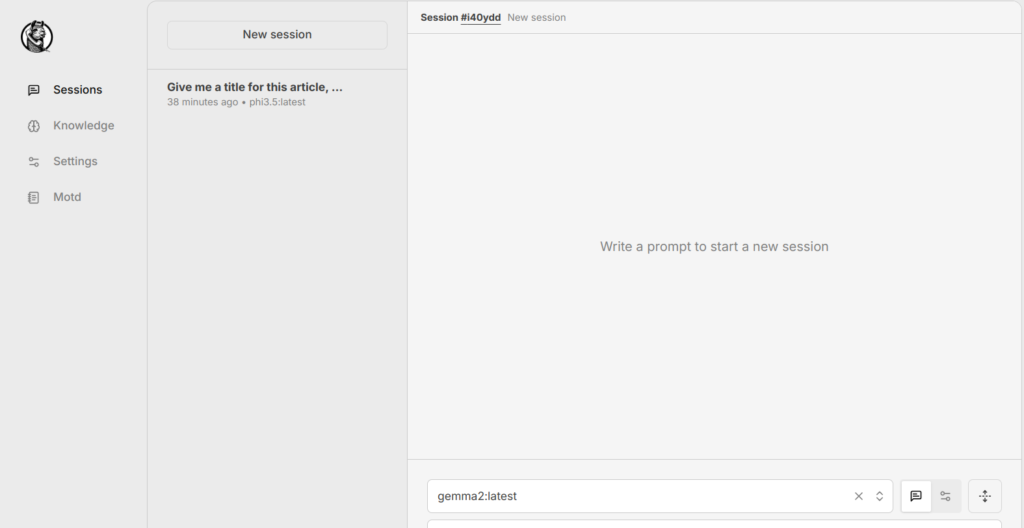
At the bottom right of the ‘Session’ menu is a box for me to enter the prompt I am going to use.

You can see the output below that is easily accessible.

The output is separated into a code block and a Markdown block so that it is easy to copy the code into a code editor and the Markdown into an editor. Hollama has made working with Ollama much easier for me. Once again demonstrating the versatility and power of open source.
Neofetch: The Universal System Info Display Tool
Neofetch, hosted on the reputable and active project homepage at the Github repository, is designed to create system configuration screenshots on various platforms. The primary difference between Neofetch and ScreenFetch lies in its broader support; it extends beyond Fedora, RHEL, or CentOS and provides compatibility with almost 150 different operating systems, including lesser-known ones like Minix and AIX!
The Neofetch installation procedure is equally straightforward:
Debian and Ubuntu users use the following command:
$ sudo apt install neofetchFor Fedora and other RPM-based distributions use the following command:
$ sudo dnf install neofetch
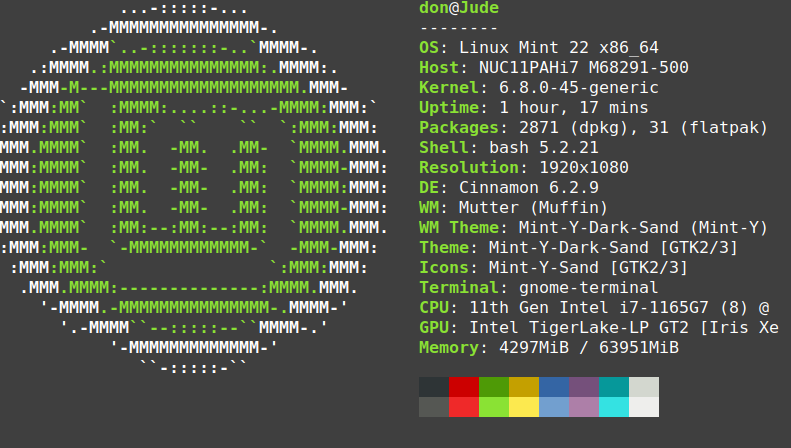
You can also install neofetch on other operating systems including MacOS.
$ brew install neofetch
Once installed, Neofetch provides a standard system info display that can be further modified for your specific preference: image files, ASCII art, or even wallpaper, to name a few; all these customizations are stored in the .config/neofetch/ directory of the user’s home folder.
Discovering New Passions: Writing, Linux, and Sharing Open Source Stories
Our children gifted with a subscription to Storyworth for Father’s Day this year and each week a new writing prompt arrives in my email inbox. This week the prompt was what are some hobbies you have pursued or want to pursue in your retirement. It took me a while to think about that topic. I am not a guy to put together model planes and I don’t have a train set. I don’t play golf.
I walk, tinker with computers and write. I didn’t think of writing as a hobby until this week and maybe it’s not exaclty a hobby in the traditional sense but it’s a way for me to share my thoughts and journey with the wider world. I have been blogging frequently since early 2006 and have written over nineteen hundred articles for my own blog. In addition I have written hundreds of articles that have been published on a variety of sites including Both.org where I am a regular contributor. I also write for Allthingsopen.org and TechnicallyWeWrite.com.
I have created most of my content this year for Both.org, where we focus on Linux and open source. We are seeking individuals who would like to share their Linux and open source journey with our audience. Our website has been attracting more and more visitors. If you have an open source story to share, we encourage you to join us. Later this month, I’ll be traveling to Raleigh, NC to attend All Things Open. This will be my tenth ATO, and I am excited to learn from the people I will meet.
Write for us! We have a style sheet with guidelines and we’d love for you to share your open source journey with us.
