Introducing Jan: A Privacy-Focused, Locally Hosted Open Source GPT for AI Enthusiasts

Are you looking for a locally hosted open source GPT that protects your privacy while allowing to leverage the latest AI models? Then you need to download Jan. Jan is easy to install on Linux, macOS and Windows and has excellent documentation to guide that process.

Jan is a ChatGPT alternative that runs 100% offline on your desktop. The goal is to make it easy for anyone, with or without coding skills, to download and use AI models with full control and privacy. Jan operates on a truly open-source model with an Apache 2.0 license. It stores all data locally, so internet usage is optional since it can function entirely offline. Users have the flexibility to choose AI models, both local and cloud-based, without the worry of data being sold. Jan is powered by Llama.cpp, a local AI engine that offers an OpenAI-compatible API This enables you to utilize AI capabilities in various applications on your laptop or PC.

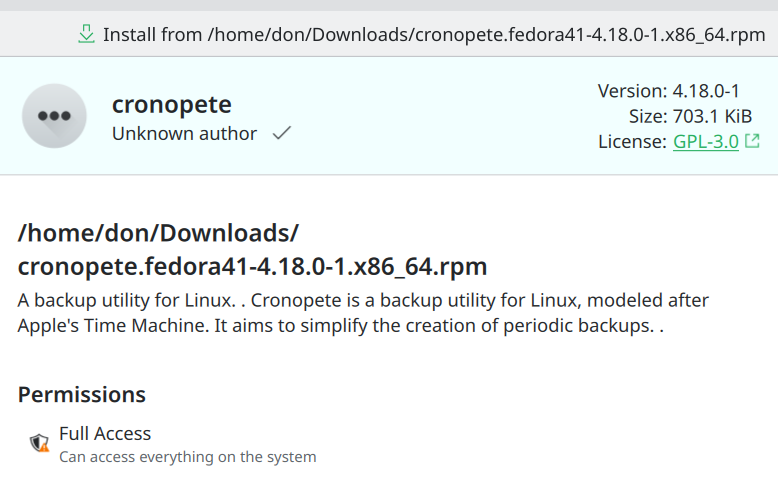
I downloaded and installed Jan on Linux Mint 22.1 using the deb file. If you are using a non-Debian based Linux like Fedora you can install the app image file. I also downloaded and installed Jan on my M3 MacBook Air. The project has excellent documentation which makes it easy to get started using Jan. Be sure to consult it.

As suggested in the documentation I downloaded and installed the Jan-nano-128K model. The project provides excellent resources which helped me to learn how to use the LLM. I decided to see if it could give me the code for a simple web app that converted Fahrenheit to Celsius using Python and Flask. The model took about fifteen seconds and then gave me the code which I copied and pasted into VSCodium and saved it as a Python file. The model suggested I install Flask and gave me the code pip3 install Flask. I saved the file as directed and then presented me with the dialogue below. The result was two files which I saved in the Python virtual environment on my computer.

The Python file:

from flask import Flask, request, render_template

app = Flask(__name__)

@app.route('/', methods=['GET', 'POST'])
def convert_temp():
    result = None
    if request.method == 'POST':
        fahrenheit = float(request.form['fahrenheit'])
        celsius = (fahrenheit - 32) * 5/9
        result = celsius
    return render_template('convert.html', result=result)

if __name__ == '__main__':
    app.run(debug=True)

The second file was an HTML file which was stipulated in the code Jan produced.

<!DOCTYPE html>
<html>
<head>
    <title>Fahrenheit to Celsius Converter</title>
</head>
<body>
    <h1>Fahrenheit to Celsius Converter</h1>
    <form method="post">
        <label for="fahrenheit">Enter Fahrenheit:</label>
        <input type="text" id="fahrenheit" name="fahrenheit" required>
        <button type="submit">Convert</button>
    </form>
    {% if result is not none %}
    <h2>Result: {{ result }}°C</h2>
    {% endif %}
</body>
</html>

I copied both the code snippets into VSCodium and saved them to the Python virtual environment which i created using the following command:

python3 -m venv temperature

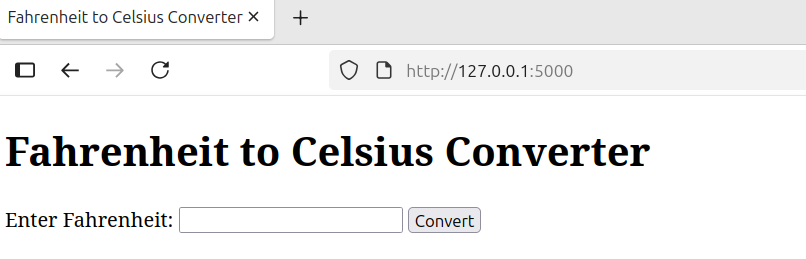
I opened a terminal and gave the following command python3 temperature.py. Then I opened my browser and pointed it to https://127.0.0.1:5000 as directed and was presented with the following simple web app that I had requested the model to create.

Screen picture by Don Watkins CC by SA 4.0

Reading the project’s extensive documentation is crucial and I also found that the community maintains a number of useful resources including Github, Discord, X and LinkedIn. The project has a blog with a number of useful resources too.

AI Voice Generation Made Easy with Pinokio and OpenAudio

Are you a scientist, developer or just a tinkerer like me? Are you fascinated with the power of AI to generate and clone human voice to include in your work. OpenAudio might be what you are looking for. Leveraging the power of Pinokio it’s easy to download and install OpenAudio on your computer. In this brief introduction I am using an M3 MacBook Air with 16 GB RAM. Follow these instructions to install Pinokio on your computer and discover how easy AI generated speech can become. Pinokio is a browser that enables you to install, run, and automate any AI on your computer.

Now that Pinokio is installed I just click on the ‘Discover’ button at the top right side of the application browser and look for OpenAudio which is the first application listed in the Apps section. Pinokio. is open source with an MIT license and OpenAudio is open source with an Apache 2.0 license. It is based on FishSpeech and has recently rebranded itself as OpenAudio.

Screen picture by Don Watkins CC by SA 4.0

The project has seventy-seven contributors and states on their website that: “We are incredibly excited to unveil OpenAudio S1, a cutting-edge text-to-speech (TTS) model that redefines the boundaries of voice generation. Trained on an extensive dataset of over 2 million hours of audio, OpenAudio S1 delivers unparalleled naturalness, expressiveness, and instruction-following capabilities.”

This model was easy to install on Pinokio and you can quickly and easily start producing your own AI generated speech with it. Your experience may vary depending on your processor and RAM.

Screen picture by Don Watkins CC by SA 4.0

Once installed you will be presented with this easy to use interface.

Screen picture by Don Watkins CC by SA 4.0

These four lines of text generated the audio in 77 seconds in wav format and resulted in 8 seconds of audio in a 684 KB file. There is a download button at the top right of the playback window.

Listen to the audio and judge for yourself.

In addition to text to speech synthesis OpenAudio supports voice cloning. You can use your own voice or upload a sample. Five to ten seconds of reference audio is useful for the generation of the cloned voice. There is a dialogue box at the lower left of the display where this is accomplished along with other controls that override the default settings.

Use of this model is governed by Creative Commons CC by NC-SA 4.0. The project also includes a caveat:

“We do not hold any responsibility for any illegal usage of the codebase. Please refer to your local laws about DMCA and other related laws.”

The model is a text-to-speech model based on VQ-GAN and Llama developed by Fish Audio. There are links to the source code and models. The project maintains a Discord channel and a presence on X. Visit the OpenAudio blog for up to date information and research.

Have some fun and install Pinokio and OpenAudio on your computer today. Leverage the power of open source and AI in your projects and join their community of developers if you are inclined.

Simplifying local AI with Pinokio

Are you looking for a way to leverage AI without having to be a developer or an experienced coder then Pinokio is just what the doctor ordered. Best of all you can run Pinokio on your own computer so you don’t have to sacrifice your privacy. Pinokio stands out as a revolutionary tool that merges the power of open-source automation with the simplicity of a browser interface. Built with developers and curious tinkerers in mind, Pinokio is redefining what it means to use a browser—not just to explore the internet, but as a platform that allows even inexperienced users the ability to download and launch AI applications that ordinarily would require lots of know how and skill.

Using Pinokio you can easily install, run, and automate any AI tool on your computer. Anything you can execute in the command line can be streamlined using Pinokio scripts—all through an intuitive, user-friendly interface. You can use Pinokio to install AI apps, manage and run those apps, create workflows for installed AI apps. There is lots of help available to help you get started with Pinokio by following @cocktailpeanut on X or joining the Pinokio Discord to ask questions. Pinokio is open source with an MIT license.

The project has detailed directions for installation your operating system and supports Windows, macOS and Linux. I chose both the Linux and macOS installs. Pinokio is supported on both the legacy Intel Mac and the Apple Silicon Mac. If you are a Linux user like me follow this link to find either the deb or rpm package for easy installation or the source code to compile the application for yourself.

I also installed Pinokio on my M3 MacBook Air. The Apple Silicon install is a little trickier but once you follow the excellent documentation you will be up and running. Once the initial application is installed and launched on either platform, the Pinokio environment is automatically and seamlessly set up during the first launch. When that was accomplished I was eager to dive in and discover what AI applications I could use. At the top of the Pinokio browser there is a ‘Discover’ button that takes the user to a number of applications that can be setup and launched. When the discover button is pressed the user is presented with the following display of News and Apps that can be loaded.

Screen picture by Don Watkins CC by SA 4.0

There are dozens of AI apps with certified scripts that can be installed. There are almost too many to choose from. I knew from experience that though my Linux computer is an i7 with 64 GB RAM that it lacks a GPU so running AI apps on that platform would mean the processing would be slow. I elected to use the M3 MacBook with 16 GB RAM. Much faster processing. My first choice was FaceFusion. FaceFusion has an Open RAIL-S license

Screen picture by Don Watkins CC by SA 4.0

FaceFusion is a powerful tool for face swapping and enhancement. I decided to install it with Pinokio on my Apple Silicon Mac. Using Pinokio it is easy to install this AI app by clicking the ‘One-Click install’ button and waiting a short period of time to install the app. Once the app is installed in Pinokio it can easily be launched from the browser.

Screen picture by Don Watkins CC by SA 4.0

Once FaceFusion is launched I am presented with a menu interace to choose how I will run the application.

I chose ‘Run Default’ and I am presented with an elegant yet easily managed interface for enhancing facial images. In the browser I can see that FaceFusion is running on port 7860 on the localhost.

Screen picture by Don Watkins CC by SA 4.0

Pointing my browser to localhost:7860 I can see the FaceFusion app running.

Screen picture by Don Watkins CC by SA 4.0

Now I can have some fun with faces. I chose to use another AI program to generate an image of a handsome guy with blonde hair and blue eyes like I used to have earlier in life. That is the source image I am inserting into the FaceFusion app. Then I inserted a recent picture of myself taken earlier this year.

Screen picture by Don Watkins CC by SA 4.0
Don Watkins wearing a scarf
Photo by Don Watkins CC by SA 4.0

Five seconds later after I clicked the ‘Start’ button at the bottom of the app I have the new me. Maybe someone will develop HairFusion too. Have some fun with your images and explore FaceFusion more thoroughly.

Image created by FaceFusion

The power of LibreOffice

I have many documents created with Microsoft Office for assignments written for graduate school courses years ago. How can I easily convert those dozens of documents to a different format without using an online application? This is an excellent example of the power of open source.

Five years ago I took a course at a local university where all of the documents were provided in ‘docx’ format. Is there a way to convert those documents to an ‘odt’ format? There is and it is quite simple.

$libreoffice --headless --convert-to odt *.docx

What if I decided I wanted to convert those ‘docx’ items to ‘html’ so they could easily be shared on my classroom website. What if I had wanted to convert all those documents to html?

$libreoffice --headless --convert-to html *.docx

I can use the same tool to turn those ‘docx’ files into ‘pdf’ files with an iteration of the same command.

$libreoffice –headless –convert-to pdf *.docx

Using LibreOffice from the command line inside the directory where the files you want to convert is easy and the conversion is accomplished in a matter of seconds depending on your processor and memory. You can find many more uses of LibreOffice from the command line by entering the following command on your own command line if you have LibreOffice installed as most Linux distributions do.

$libreoffice --help

This is a great example of the power of open source software.

Mastering Joplin: Tips for Faster Note-Taking

Joplin has become my default note taking app. I use it for everything whether short notes on what to pickup at the store to saving articles I inted to read later with the web clipper. I have an iPhone, a laptop and a desktop and I depending where I find myself on any given day there’s one application which helps me to record everything I want to remember for later use. That’s Joplin.

Using Joplin shortcuts can significantly improve your efficiency, workflow, and note management experience. If you are using iOS you can send weblinks directly to Joplin by selecting the ‘share’ button at the bottom of the web page you want to add to your notebook

Screen picture by Don Watkins CC by SA 4.0

After selecting the share button and then select which iOS application you want to send it to. Joplin is one of the options.

Screen picture by Don Watkins CC by SA 4.0

After selecting the ‘Joplin’ app from the list of apps a new note is saved to your Joplin application. For more help consult the documentation on Joplin’s app page.

Screen picture by Don Watkins CC by SA 4.0

Much of my day is spent using a laptop or desktop where I do the majority of my writing. When using Joplin in that setting I’ve come to rely on handy keyboard shortcuts which streamline the notetaking and writing process. Here is a list of common Joplin shortcuts despending on your operating system.

Ctrl-n – new note
Ctrl-s – synchronize
Ctrl-f – find and replace
F6 – search is all notes
Ctrl-a – select all
Ctrl-b – bold (selection)
Ctrl-c – copy
Ctrl-x – cut
Ctrl-v -paste
Ctrl-shift-t – insert date
Ctrl-q – quit

For additional Joplin help be sure to check out their excellent documentation. The project also maintains a forum where you can learn and share. Joplin is an open-source project, and your donations help support its ongoing development. Creating a high-quality application not only requires time and effort but also incurs costs—such as purchasing digital certificates for app signing, covering app store fees, hosting services, and the hardware needed to build and test across multiple platforms.

What is humility?

Humility is the quality of being humble—having a modest view of your own importance. It involves recognizing your limitations, being open to feedback, and valuing others without arrogance or superiority.

Key aspects of humility include:

Self-awareness: Knowing your strengths and weaknesses without inflating or denying them. Openness to learning: Being willing to admit when you’re wrong and eager to grow from experience or others’ input. Respect for others: Valuing people equally, regardless of their status, background, or beliefs. Service-mindedness: Putting others’ needs before your own when appropriate, without seeking recognition or praise.

Humility isn’t about thinking less of yourself—it’s about thinking of yourself less. It’s a strength that promotes connection, learning, and integrity. — via ChatGPT

Irenaeus Blessing

It is not you who shapes God, it is God who shapes you.

If then you are the work of God await at the hand of the artist who does all things in due season.

Offer him your heart soft and tractable, keep the form in which the artist has shaped you. Let your clay be moist lest you grow hard and lose the imprint of God’s fingers.

~ St. Irenaeus

Nextcloud with a snap

Recently I have been tasked with assisting a local medical office with finding a new way to securely store medical images. The office needed a robust replacement for an aging Windows computer that was soon to be out of date. I considered a number of solutions among them TrueNAS, OwnCloud, Nextcloud and a Samba share. Nextcloud seemed to fit the bill but how to deploy it became a concern. I downloaded a Nextcloud iso file from Turnkey Linux and built a server with VirtualBox. I considered a Docker implementation and then I discovered what proved to be the easiest which was a snap installation on Fedora KDE Plasma. This proved to be the easiest.

First I had to install snap on Fedora KDE Plasma 42:

$ sudo dnf install snapd

Install the Nextcloud snap package:

$ sudo snap install nextcloud

Now that snap is installed i opened a browser and pointed. Logout and log back in to make sure log out and back in again, or restart your system, to ensure snap’s paths are updated correctly. Once that is accomplished point your browser at http://localhost and login. Enter your own admin user and password and click on ‘Install.’

Screen picture by Don Watkins CC by SA 4.0

When the installation was complete was taken the next display appeared so that I could accept the default applications.

Screen picture by Don Watkins CC by SA 4.0

Once the recommended applications are downloaded and setup my new Nextcloud installation is ready to use.

Screen picture by Don Watkins CC by SA 4.0

The default install is for ‘localhost’ which is fine for the local user but I wanted to configure this Nextcloud install for use by other computers on the local area network which means changing the config.php to the ipaddress of the local machine. I was familiar with that process from previous installs using the Turnkey Linux iso file but how was that different with the snap installation.

I did some research and fortunately for all of us there is a Github repository with all the answers. Open a terminal and enter the following command to change the hostname to the ipaddress or hostname where your Nextcloud installation will reside.

$ sudo nextcloud.occ config:system:set overwritehost --value="youripaddress"

This snap installation of Nextcloud is open source with a GPL v. 3.0 license. The project has excellent documentation. Be sure to open port 80 on your firewall to ensure that the other devices on your network can access the Nextcloud application. This snappy Nextcloud includes Nextcloud 31, Apache 2.4. PHP 8.3, MySQL 8.0 and Redis 7.2. For more information be sure to consult the project wiki.

My installation was on Fedora but the the snap installation is available for other distributions including Arch, Ubuntu, RHEL, Ubuntu, Debian, openSuse, Centos and more. Be sure to open the necessary ports on your firewall to ensure that others on your LAN have access to your Nextcloud server.

Cronopete: A Time Machine like backup for Linux

There are lots of ways to backup Linux. One of them is using the ‘tar’ command which was the first method I used many years ago when I was a Linux newbie. Later I used ‘rsync’ to backup a mail server that was running on RHEL 2.1. Linux is like a Swiss Army knife when it comes to bacup options. I’m no longer backing up file servers. These days I’m backing up my workstation or the laptop I used to write most of the articles I write. I had been using DejaDup when a fellow blogger suggested I try Cronopete. He said it was a lot like Time Machine on macOS. Having used Time Machine in the past I was familiar with the interface and the general idea.

Cronopete is one of the gems of the open source world and I’ve often wished that it were available for more than Linux. The current version is 4.19.0 and the easiest way to get it is to go to the Rastersoft website and download it for your Linux distribution. The project provides packages for ‘rpm’ and ‘deb’ based systems. You can choose to build it from source if you need a different solution. I downloaded the ‘rpm’ package for Fedora because that’s what I needed. Once the package is in my download folder I double click and it’s ready to install.

Screen picture by Don Watkins CC by SA 4.0

After the software is installed the program creates a shortcut on the task bar at the lower right of the display.

Screen picture by Don Watkins CC by SA 4.0

Click on that icon and you have the option to ‘Configure the backups’. Immediately an intuitive graphic appears that’s very easy to configure options for your particular backup needs.

Screen picture by Don Watkins CC by SA 4.0

At the top right of the configuration panel you are given the option to store the backups in a local folder or in an external drive. I have a one terabyted external drive for my workstation and a smaller thumb drive for the laptop. In the middle of the configuration panel there is an option to change the backup destination. Next to that is a button to choose what folders to backup. The program defaults to ‘/home/user’. Cronopete is not designed to backup an entire computer along with configuration files like Timeshift on Linux Mint. Be sure to ‘Enable backups’ at the lower left of the configuration panel.

According to the project, “As a backup utility, it makes periodically a copy of all the user files in a separate hard disk, thus allowing to recover them in case of accidentally deleting a file, or if the main hard disk gets damaged. Each copy is stored separately (one copy per hour is kept for the last 24 hours, one daily copy for the last 15 days, and one weekly copy for the rest), which means that the user can choose which copy to restore. Files that do not change between backups are stored as hard links, and thus each new copy uses much less disk space than a true full copy. Internally, it uses RSync to do all the backup work.”

Configure what you are going to backup is the next process and the interval for those backups if desired. There are advanced options which include backing up hidden files and folders and extended attributes.

Screen picture by Don Watkins CC by SA 4.0

Once the configuration is complete I am ready to perform the backup. I am going to choose the first option to ‘Back Up Now.’ If this is your first backup Cronopete will provide you with the option of formatting the backup drive.

Screen picture by Don Watkins CC by SA 4.0

If your drive is already formated choose ‘Mount and Open’ and now you are ready to begin your first backup. When the home directory is backing up the ‘anaCronopete’ icon on the task bar will appear green. When the process is complete it will return to a gray color.

Screen picture by Don Watkins CC by SA 4.0

After backing up the files you can open your file manager and you will find a folder marked ‘cronopete.’ Opening that folder you will find subfolders each date and time stamped for the backup that occurred.

Screen picture by Don Watkins CC by SA 4.0

Restoring from backup is just as easy. Return to the ‘Cronopete’ icon on the taskbar at the lower right of the display and choose ‘Restore files.’ You will be presented with a graphic of your backed up files each with a time stamp of when the backup occurred. Use the two blue arrows at the top right to find the particular backup time and either select all or select the folder and/or the file you want to restore. Highlight the file or folder and click on ‘Restore files’ at the top left of the display.

Cronopete is open source with a GPL v 3.0 license.

Finding the Perfect Linux-Compatible Computer

Let’s suppose you want to get into the Linux thing and you want to do it with a new computer. You could buy a Linux laptop or desktop from a number of different vendors including System76, Tuxedo, Dell, Lenovo and others. What if you come across a computer in a technology store how do you determine if it’s going to work with your favorite Linux distribution. You check the Hardware for Linux database or you could check with Ubuntu Certified where folks have already done the homework for you. Fedora maintains another list of certified hardware.

Today I was shopping at a prominent technology store and spotted a Dell Inspiron 3530 that was just what I was looking for and at a price I was willing to pay but I wanted to make sure that it would work with Linux so I did a quick internet search and Ubuntu Certified supplied the answer to my question. I brought this sleek new laptop home and using a Live USB with Fedora 42 KDE Plasma and quickly determined that the hardware was going to work. These databases are a great way to help users determine the likelihood that there new or used computer would be a suitable candidate for Linux.

I had Cronopete installed on the laptop I was replacing so I did a quick backup of all my files and then installed Cronopete on the new laptop. Cronopete easily restored the files and quickly I was ready to begin writing this article.

This laptop is modest but adequate and I fell in love with it as soon as I started using it. The unit has a touch screen and it works well. It is going to be more than adequate for my needs and I am grateful that I found it. Here’s a snapshot of the system using

$ inxi -b
 Host: fedora Kernel: 6.14.9-300.fc42.x86_64 arch: x86_64 bits: 64
  Desktop: KDE Plasma v: 6.3.5 Distro: Fedora Linux 42 (KDE Plasma Desktop
    Edition)
Machine:
  Type: Laptop System: Dell product: Inspiron 15 3530 v: N/A
    serial: <superuser required>
  Mobo: Dell model: 0VPMKH v: A00 serial: <superuser required> UEFI: Dell
    v: 1.15.0 date: 09/06/2024
Battery:
  ID-1: BAT0 charge: 38.9 Wh (96.3%) condition: 40.4/40.0 Wh (101.0%)
CPU:
  Info: 10-core (2-mt/8-st) 13th Gen Intel Core i5-1334U [MST AMCP]
    speed (MHz): avg: 669 min/max: 400/4600:3400
Graphics:
  Device-1: Intel Raptor Lake-P [UHD Graphics] driver: i915 v: kernel
  Device-2: Sunplus Innovation Integrated_Webcam_HD driver: uvcvideo
    type: USB
  Display: wayland server: Xwayland v: 24.1.6 compositor: kwin_wayland
    driver: gpu: i915 resolution: 1920x1080~60Hz
  API: OpenGL v: 4.6 compat-v: 4.5 vendor: intel mesa v: 25.0.7
    renderer: Mesa Intel Graphics (RPL-U)
  Info: Tools: api: clinfo, eglinfo, glxinfo, vulkaninfo
    de: kscreen-console,kscreen-doctor wl: wayland-info x11: xdriinfo,
    xdpyinfo, xprop, xrandr
Network:
  Device-1: Realtek RTL8852BE PCIe 802.11ax Wireless Network
    driver: rtw89_8852be
Drives:
  Local Storage: total: 476.94 GiB used: 7.91 GiB (1.7%)
Info:
  Memory: total: 8 GiB note: est. available: 7.44 GiB used: 3.35 GiB (45.0%)
  Processes: 349 Uptime: 18m Shell: Bash inxi: 3.3.38

Switching to Linux can be an exciting journey, and having a computer that seamlessly supports your favorite distribution makes all the difference. With resources like Ubuntu Certified and Fedora’s compatibility database, finding Linux-ready hardware has never been easier. My new Dell Inspiron 3530 may be modest, but it’s exactly what I needed—reliable, responsive, and ready to power my workflow. Thanks to Cronopete, setting up was effortless, allowing me to jump right into writing. If you’re considering making the switch, remember that a little research upfront can ensure a smooth transition into the world of Linux. Happy computing!